
How to build a big, powerful chest at home
Most guys love the bench press. Perhaps it's because a big, powerful chest turns heads or because well-developed pecs are a symbol of pushing and punching strength. In either case, there's rarely a need to encourage the typical gym-goer to focus on chest training.
But what if you prefer to train at home? Maybe you're a family man, a frequent traveler, or you have a variety of other fitness interests competing for your time. What then?
Fortunately, when it comes to building a commanding chest, the gym isn't the only battleground; you can achieve remarkable results from the comfort of your own home.
I should know. As a father of two young children, a busy business owner, and someone deeply entrenched in the world of triathlons and obstacle course racing, I've mastered the art of maximizing every minute. Home workouts have become my salvation, enabling me to gain substantial muscle and practical strength.
What's more, I've helped numerous clients face the same challenges. Many of them have opted for home-based training and have witnessed astounding transformations. Long story short, just because you train at home doesn’t mean you can’t forge a bigger, stronger chest.
In this article, I'll show you how a regular guy, who is willing to put in the work, can optimize his training, balance competing fitness interests, and make consistent progress. I hope it becomes your go-to guide for building a bigger, stronger, more athletic chest at home.
Below are links to the different sections. And please be sure to bookmark this page, so you can come back later.

An Adventure-Ready Chest
What exactly is our goal here? It certainly isn’t size at all costs, nor is it just about strength. For fitness generalists, I see five main goals:
Strength: We aim for a strong chest. This includes both horizontal and downward pressing. To achieve this we need to lift heavy often enough to get strong, but not so often that we break down. And we want to be strong across the entire range of motion in a way that prepares us for real life.
Size: Big pecs are undeniably impressive and put you in an exclusive club. To gain size, we need to directly target the relevant musculature with enough high quality training to generate growth while avoiding overtraining and junk volume.
Mobility: Improved mobility enhances athleticism and joint health and requires strength across the full range of motion of the joint. You get strong and build muscle in the ranges of motion you train, so if you’re weak in a position, you won’t get stronger by avoiding it.
Durability: We aim to avoid injury and build unbreakable shoulders and triceps. To achieve this we need to provide enough connective tissue stress to generate growth; we need to build breaks (eccentric strength); and we need to be strong in all positions (mobility). All while avoiding overtraining.
Longevity: As we age, we lose size and strength, so building muscle while we're young sets the stage for the future. Imagine yourself at 95. Can you push yourself up from the floor? To some degree the answer will depend on how you train today.
To learn more about training for longevity check out my article, “Maximizing Lifespan: The Essential Guide to Exercise for Longevity”. LINK HERE
All right, those are our goals. Which exercises should we use?

My Top Three Chest Exercises
Training the chest, in general, is not overly complex. The chest can be divided into two regions: the clavicular (upper chest) and sternal (lower chest). Exercises like flat presses and flys engage both regions fairly evenly, while dips focus a bit more on the sternal head, and decline pushups place slightly more emphasis on the clavicular head.

Additionally, you have two primary movement patterns: presses and dips. Therefore, our main objective is to develop strength in these two major movements and increase size in both chest regions.
Front Delts: It's important to note that chest and lateral deltoid training already provides a substantial stimulus for the front deltoids. Therefore, additional front deltoid exercises are generally unnecessary.
If you want to learn more about training your shoulders at home, check out my article, “How to build big, strong, durable shoulders at home”. LINK HERE.
Triceps: I'm currently working on a separate article focusing on training the arms at home. When it's completed, I'll add a link here. However, it's worth mentioning that dips and pushups alone provide a substantial tricep workout and will significantly contribute to the growth of your arms.
Equipment: For effective home training, you'll need a set of adjustable dumbbells. At some point, you may also want to consider investing in a set of gymnastic rings.
1) Push Ups
Push ups build your chest, triceps and the front of your shoulders, while offering a full, natural range of motion for your shoulder blades. You are pushing about 64% of your body weight. Push ups are a closed kinetic chain exercise (you move your body) with a full range of motion, which builds more muscle, more functional strength and more explosiveness.
Push Up Cues:
Start strong: Feet should be about hip width apart. Squeeze your glutes and abs to establish a straight body line. Hands should be outside of your shoulders and below the shoulder line. Push down strongly with your shoulders.
Maintain Elbow Position: Rotate your elbow pits forward to keep your elbows close to your body throughout the exercise.
Controlled Descent: Lower yourself down slowly and with control. This controlled descent not only encourages muscle growth but also reduces the risk of injury.
Embrace a Deep Stretch: Descend into a deep stretch to enhance mobility and promote muscle hypertrophy. However, avoid going so low that it causes joint discomfort or compromises your strength. I’m using weight plates in the video.
Powerful Ascent: When moving back up, focus on a swift and powerful ascent, using the strength of your chest, front delts, and triceps to propel yourself back to the starting position.
How to earn your first full push ups
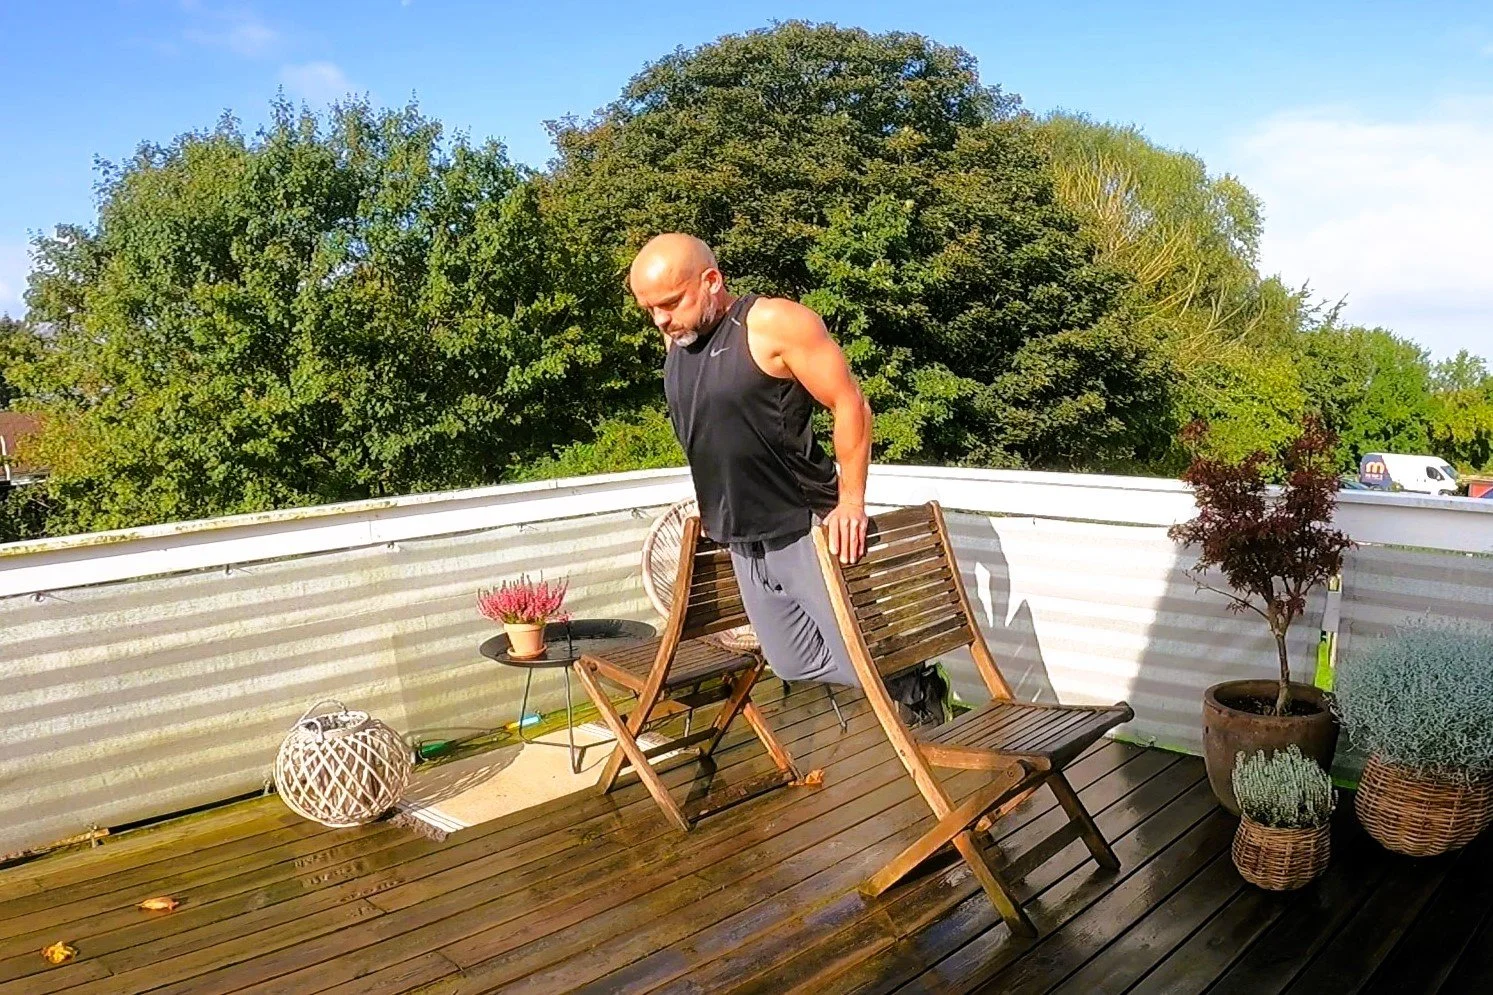
If you struggle to perform push ups, you can do incline push ups to reduce the load. For instance, you could start with wall push ups. Once you can do 20-25 perfect reps, move to countop pushups. A kitchen counter works great. Once you can dominate those, use two chairs like in the video. And once you can dominate those, you’re ready for ground push ups.
To make it even harder, you can try decline push ups. Simply put your feet up on a low box or chair. I recommend a stable object that’s about knee height. You can also add external load with a backpack and some dumbbell plates.
2) Dips
Dips are a great addition to traditional chest exercises like presses and flys. They target your chest, front deltoids, and triceps while enhancing shoulder mobility and joint strength. For the fitness generalist, dips also improve downward pressing strength and muscle coordination.
I like to use medium to light rep ranges, to minimize wear and tear on connective tissue. But if your joints can handle it, there’s nothing wrong with going heavy.
Dip Movement Cues:
Lean Forward for Chest Activation: To engage your chest muscles effectively, lean slightly forward during the dip movement.
Maintain Elbow Position: Rotate your elbow pits forward to keep your elbows close to your body throughout the exercise.
Controlled Descent: Lower yourself down slowly and with control. This controlled descent not only encourages muscle growth but also reduces the risk of injury.
Embrace a Deep Stretch: Descend into a deep stretch to enhance mobility and promote muscle hypertrophy. However, avoid going so low that it causes joint discomfort or compromises your strength.
Powerful Ascent: When moving back up, focus on a swift and powerful ascent, using the strength of your chest, front delts, and triceps to propel yourself back to the starting position.
How to earn your first full dips
If you’re struggling to perform your first dips, you can do assisted dips. Find two stable objects at about knee height. Chairs work great. Use your legs to provide assistance by taking some of the weight off your upper body. If straight legs are too challenging, you can bend your legs to further reduce the load. Once you can do 20 perfect assisted dips, you’re ready to tackle full dips.
To make dips even harder you can try gymnastic ring dips or add external weight using a backpack and dumbbell plates.
3) Dumbbell Chest Flys
Unless you’re a genetic freak with unbreakable joints and limitless energy, you can’t dip and press every session. You need an exercise that's less taxing on your connective tissue but directly targets all three heads of your chest while minimizing overall fatigue. The dumbbell chest fly is just such an exercise.
Dumbbell Chest Fly Cues:
Start strong: Maintain a slight bend in the elbow. Retract your shoulder blades. And keep your chest up.
Controlled Descent: Lower the weights down slowly and with control. This controlled descent not only encourages muscle growth but also reduces the risk of injury.
Embrace a Deep Stretch: Descend into a deep stretch to enhance mobility and promote muscle hypertrophy. However, avoid going so low that it causes joint discomfort or compromises your strength.
Powerful Ascent: When moving back up, focus on a swift and powerful ascent, using the strength of your chest to propel yourself back to the starting position.

Optimal Training Intensity for Chest
You need to train hard. That means that in most circumstances, you want to train to within 1-3 reps of failure. Failure is the point where you can't do another rep without sacrificing good form. If you’re doing pushups, failure is the point when your hips start to hing or you simply can't push yourself back up. When you're 1-3 reps away from failure, your movements typically start to slow down.
If you’re training close to failure, then the number of reps you can do will be determined by how heavy the weight is. For instance, you may be able to do 50 wall push ups, but only 5 decline push ups.
As long as you're training intensely like this, rep ranges between 5-30 can effectively build muscle. Lower rep ranges are best for building strength and stimulating connective tissue, while higher reps are great for building muscle, minimizing fatigue, and reducing wear and tear on your joints.
For a deeper dive into how to train to build muscle, check out the following section of my article, “Body Recomposition: How to lose fat while building muscle”. LINK HERE
With that in mind, here are some specific recommendations.
Push Ups: If everything feels good with no injuries or nagging pain, I recommend lifting relatively heavy when possible. If you can’t perform decline pushups, then your first goal is to get there. Start with incline pushups. When you can do 20-25 reps with good form on the first set, try regular pushups. When you can do 20-25 reps of regular push ups with good form on the first set, you’re ready for decline push ups.
With decline push ups, I like to find a weight that I can manage to lift around 8-12 times on the first set. When my reps get above 15-20 reps, I’ll add some weight and drop my reps back down.
Dips: For dips, I recommend using either a medium or light weight for most people, as dips can be taxing on your joints. If you can’t do full dips yet, start with assisted dips. Again work your way up to 20-25 good reps before attempting full dips. From there you can either start adding weight or shift to gymnastic ring dips.
Chest Flys: Here, I recommend either a medium or light weight. Personally, lighter weights (around 18-25 reps on the first set) are ideal. It gives my connective tissue a nice break from all the pressing and dips, and I get an intense burn in the belly of my chest muscles on the last 3-5 reps of every set.

Measuring and Maintaining Progress
How do you know, if you’re making progress? The last thing you want to do is spend a bunch of time lifting weights only to discover that nothing has happened. Ultimately, there are three ways to track progress, and as you’ll see below, increased strength is by far the most important. Let’s go over each of them.
Visual Progress: Your chest won’t just suddenly blow up. It can take months to see significant visual progress. In fact, the progress can be so slow that you might not notice it even if it’s working. So I recommend you take a picture at the start of your program. This will give you a point of reference so you can track your progress.
Measuring Chest Size: Measurements aren't particularly useful unless you’re relatively advanced and lean. For instance, if you’re currently losing weight, your chest measurement may go down even if you’re adding some muscle.
But having said that, here’s how to measure your chest. While standing, relaxed measure around your chest at the widest point under your armpits. As a point of reference, the average adult male has a 41 inch chest.

Progressive Overload: By far the single most important sign of progress is strength increases. If you are consistently getting stronger, you are almost certainly getting bigger. It isn’t a guarantee. You can get stronger without getting bigger. But if you follow something like the program below, strength gains are extremely likely to signal size gains.
If you’re just getting started, focus first on getting your form completely dialed in. Good form makes many of these exercises harder. Bouncing the weight and using short ranges of motion enable you to lift more weight. Take the ego hit. Use the right weight to maintain perfect form. Once you have your form nailed down, focus on adding either reps or weight every week.
Breaking Through Plateaus
What do you do if progress stops? If you are not getting stronger, here are a few things to double check.
Are you training hard enough? You should be getting 1-3 reps from failure. This is the point where the weight starts moving slowly, and it starts getting really hard. You need to train hard to get results.
Is your form correct? Double and even triple-check your form. Try filming yourself so you can see how you look. Consider getting a coach.
How is your mind-muscle connection? Can you feel the exercise working the muscle? These chest exercises destroy my chest. The muscle is often burning like crazy during the last 3-5 reps. It’s very uncomfortable.
Are you recovering? Are you giving yourself enough rest, good nutrition, and sleep to recover? If you aren’t progressing, it may be because you aren’t recovering. If your sleep, stress, and diet are decent, you may need to lower your training volume (See Below).
Are you training enough? If you are being inconsistent or only training 3 sets of push ups once a week, you probably aren’t training enough to make noticeable gains.

Constructing an Effective Chest Workout Program
If you train hard with good technique, then total training volume becomes the most important variable for muscle growth. Training volume refers to the total amount of work you do per muscle per week. In this instance, we are focused on the chest, and we measure volume using sets.
Generally, the most volume you can do and still recover from is going to produce the most growth. However, there are limits, especially in terms of recovery. Here are some rough guidelines to give you an idea of the relationship between training volume and growth.
Total Newbies: If you’ve never lifted weights before, then any amount of lifting is going to lead to some strength and muscle gains. But those gains will end very quickly if your volume is too low.
Beginner: If you’ve been lifting for less than a year or two (or you’ve trained longer but inconsistently on a poor program), you can likely make gains on anything between 6-15 sets per week. If you can recover, then more sets cause more growth.
Intermediates: After the first year or two (of training hard and consistently with a good program), you often need more volume to keep making progress, and the range might be more like 10-25 sets per week.
Maintenance: Typically, you can maintain with something like 4-6 sets per week. For instance, I do about 6 sets per week to maintain when I’m training for big ultra-endurance races. That way I can focus the majority of my time and energy on Ironman or Spartan Ultra training.
If you’d like to learn more about maintaining size and strength during Ironman Training, check out my article, “Can you finish an Ironman without losing muscle?” LINK HERE
Now, hopefully, you’ve noticed that I gave ranges. There are two reasons for this. First, all of this varies tremendously from individual to individual. You’ll need to experiment to see where you’re at. If you are doing too much, you won’t be able to recover, which means you’ll stop making progress, and you’ll start noticing nagging pains. If you do too little, you will progress very slowly or not at all.
Second, there’s a fairly large target here. The top end of the range will give you the quickest results while the bottom end of the range will give you the slowest results.
Here are two plans that you can use as templates for your own training.
A Slow & Steady Plan
For most beginners training 2x per week for a total of six sets is a solid minimum effective dose. Your gains will be very modest, but over time, they’ll add up. 6 sets are also generally enough for most guys to maintain their gains. So, if you don’t have much time, have other training priorities, or keep getting hurt with higher training volumes, here is a great program for you.

If you hit a plateau or want to accelerate your progress, try adding a set every 2-4 weeks all the way up to 10 sets per week. Training two times a week is probably a bare minimum for real gains. If you have the time, I highly recommend training at least 3x per week.
A Plan for Committed Athletes
I recommend starting with 9 sets per week and then ramping up slowly by adding one set every 1-3 weeks. If you start running into recovery issues or joint discomfort, back off. 15 sets per week is probably a good upper limit for the vast majority of athletes, and most beginners will do better with 9-12 sets per week. Here’s how you might program that.


Addressing Nagging Joint Pain
Okay, you pushed it too hard too fast and now you have a bit of shoulder or elbow pain. Maybe it’s not enough to visit the physical therapist yet, but it hurts. Now what?
Rule #1: Don’t train through joint pain!
Instead, you can try to train around the pain. Here we have a few things to try.
Double-check your form. There’s a reason coaches recommend doing exercises in specific ways. So the first thing to look at is your form.
Try using a lighter weight. For example, if it irritates your shoulder when you do heavy dips, try an easier/lighter variation. Find a load that you can just manage to lift 20-25 times and see if that takes the stress off of your connective tissue.
Change exercises. There are tons of great chest exercises. These are my three favorites, but there are plenty of others.
Use a shorter range of motion. For instance, it hurts at the bottom of the dip, you’re going too deep.
Cut your volume back. If all else fails, reduce your volume. Sometimes you just need time to heal.
In most cases, one of the above usually does the trick. This is especially true if you catch it early. Don’t train through pain!
Once you find a solution that works, it’s crucial to give yourself time to heal and strengthen. If you use one of the first four options, I recommend waiting months before testing the original weight, range of motion, and/or exercise. Assuming you’re still making progress, there’s no hurry to go back and reinjure yourself. If you had to cut your volume, then be sure to SLOWLY raise the volume back up after all pain and discomfort are gone. If none of the above works, it’s probably time to visit a specialist.
Thanks for reading!
This is part of a series of articles designed to help you get great results training at home. Below you’ll find links to the other articles in the series.